Category Archives: Firewall Forward

More Antennas and Fittings

After giving things a lot of thought, I finally summoned enough resolve to drill some holes in the aircraft skin, and most, where none had existed before. You’ve got to do what you’ve got to do. Antennas, static ports and bulkhead connectors need holes. Now I’ve got them.

Determining the location of antennas is where most of the thought went. I tried to get the transponder blade antenna pretty close to the fuselage centerline – right in the middle as it turned out. Airframe shading and interference between antennas and other equipment are key concerns. The COM 2 antenna is also on the bottom of the fuselage, just behind the rear wing spar carry-through. I tried to keep it as far away as I could from the the transponder antenna and GMU 11 magnetometer. I didn’t get all of the separation distance called for in various installation documents, but what could I do? This is a tiny little airplane — not a King Air. Time will tell if it’s enough. Build on.

All of the antennas are made by Rami and came along as part of the package with my panel, harness and avionics. Some builders have made rather large doublers. For the moment I’m using only the doublers that came with the antennas. I may eventually go beyond those, but for now, everything is in place.

Of the 14 holes that were already in the ELT mounting tray, none were where I wanted them to be. I made 4 more in the tray that allow 4.0 x 10mm rivets, through the fuselage skin and into the tray, without interfering with the plastic case of the ELT itself.

I made an airframe ground lug from a 5/16″ brass bolt and installed it at the location where the KAI called for a 12 AWG avionics ground bus wire to be passed through a grommet in the firewall on it’s way to the negative battery terminal. I’ve decided to have a 10 AWG cable for the avionics ground bus to the lug (inside) and a 4 AWG cable from the same lug, on other side of the firewall, to the battery. I plan to attach a 6 AWG engine [starter] ground cable to the lug as well.

Rubber fuel lines penetrating the firewall through ordinary grommets, as the kit assembly instructions (KAI) call for, didn’t float my boat. I’ve gone with AN6 bulkhead fittings for the fuel supply and return lines. These fittings need smaller holes than the ones pre-punched in the firewall by the factory. I designed and fabricated a doubler out of steel and riveted over the original holes. The fittings are mounted there.

A set of step-drills is absolutely essential for making holes in sheet metal. I’ve got a cheap set but they’ve worked well.

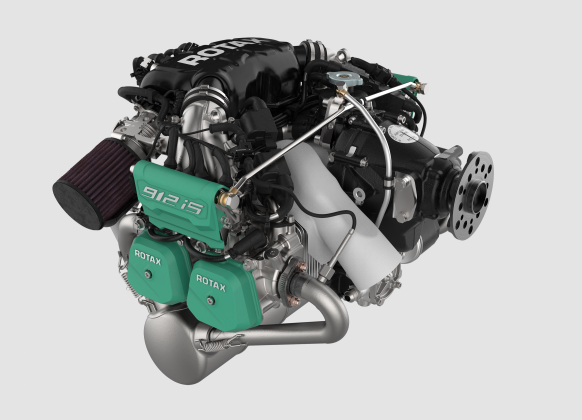
I’ve set M6 rivnuts (with some JB Weld epoxy for good measure) in the fuselage rib, behind the parachute compartment, where the Rotax ECU goes. Getting the 3 large engine wire bundles and connectors in place, given the minimal space remaining with the LRU rack mounted, is going to be super tight. Fingers crossed.

As long as I had rivnuts and JB Weld handy, I decided to rework the Andair Duplex Fuel Selector valve to receive M4 rivnuts and then set them in place. These steps are called out in the KAI.

My factory quick-build fuselage came with not one – but two – static ports in the rear fuselage. However, the factory now says not to use them. They’ve also said they haven’t officially decided where the new location(s) should be either. They think it’s going to be finalized “soon” and anticipate that it’s going to be just in front of the fresh air NACA duct near the front of the fuselage. They sent me a picture and I’ve gone with that location.

The outside air temperature probe found its home in the LH fresh air NACA duct.

Cabin and Firewall

With the firewall forward kit and the avionics, related tasks are accomplished.

Misc Rework – Firewall and Wingtip

Work on the RH wingtip continues. Getting a good fit (matching the wing airfoil) is what I’m after. It has to happen in small steps. I’m getting there.

The battery box reinforcement channel is going to be tricky to rivet to the firewall. That’s because the shape of the channel overhangs and blocks access for the rivet setting tool. A few of the holes can be riveted from behind, but a couple holes are only accessible from the front. I’ve asked the factory about it. (This channel really should have been mounted before the parachute box was assembled at the factory.)

I’ve decided in favor of having the full-airplane ballistic parachute. I’ve thought about it – long and hard. The terrain in Pacific Northwest Washington is very rugged – utterly unforgiving should the occasion of an emergency off-airport landing ever present itself. Having the parachute will give me some peace of mind. I think it will also open the door to some evening and night flights that I wouldn’t otherwise consider.

The parachute system adds weight and expense, but it likely adds a bit of safety margin and value, as well.

There are break-away skin panels that cover the parachute compartment. Mounting them will involve countersunk rivets. The flanges of the firewall, RIB-003 and the curved top-skin, in front of the windscreen need to be dimpled with a squeezer. To do that, I have to remove the top-skin that was partially riveted at the factory. I also have to countersink some of the holes in the narrow cowl mounting strips, using a 120 deg pilot-cutter and micro-stop cage. I’m doing this countersink rework on the plane, so it’ll be a freehand operation with my lithium battery-powered drill. Having the top-skin off will provide improved access for installation of the avionics rack and wiring harness.

The Engine – Rotax 912iS Sport

I have to say, it looks suspiciously like — a brand new airplane engine!!!

Admittedly, there’s not much building going on here, but there are some cool details to look at. The engine comes with its Engine Control Unit (ECU) – the computerized module that monitors and manages the engine performance. There’s a fusebox and dual voltage regulator module. And, there’s a completely assembled fuel pumps module. Early Sling 2 kits apparently required building up the internal plumbing with two 2 pumps, check-valves, hoses and clamps. I’ve been spared all of that. Each modules are matched to the engine serial number and were presumably used to test run the new engine (for about an hour) at the BRP Rotax engine factory in Austria.

There are some small parts for specialized electrical connectors that I’ll send off to my wiring harness builder for incorporation. There are also some bushings and hardware for mounting the Whirlwind propeller, which should arrive in a few days.

Rotax 912is Sport Engine – New in Box

Big Wednesday kicked off with a scenic morning drive from Sequim to a freight forwarding company in Kent, Washington. My engine and firewall forward kit was shipped Cargolux air-freight from South Africa, changing planes in Belgium. The goods arrived a couple of days earlier at Seattle-Tacoma International Airport (KSEA, SeaTac). Having cleared customs, it became available for me to collect.

I’ve looked forward to a day like this for I don’t know how many years. Having an absolutely brand new airplane engine is almost too much for me to grok. I’ve been harboring thoughts of rebuilding the O-32O in my ’84 Warrior, almost since the day I bought it 20 years ago – but, it hasn’t happened. It’s still running strong at TBO. And now, I’ve got the Holy Grail in hand – a factory new airplane engine! Oh my!

This new engine and the Sling 2 airplane I’m building are a match made in heaven – 21st century all the way!

Custom Cowl Mounting Strips – Trial Fit

The upgraded cowling strips fit remarkably well. Clecos are in many of the holes at this point and that’s without having to drill anything out. Ultimately, holes will need to be lightly ‘dressed’ with a #30 reamer. This will allow the rivets be positioned and set easily in the 3 and 4 layer stack-up of parts without a fight. The good news is, it’s all a pretty decent situation to begin with.

Earlier I did a little priming of the underside and edges of fastening tabs for the galvanized steel firewall. It’s winter cold outside, and I can’t really do spray painting just now. It was a small hidden area so I brushed on the gray 2-part epoxy primer. It took several days to cure fully. I’ll probably paint the entire firewall, mostly for aesthetics, when the weather warms a bit.

Care will be needed to address some gaps between layers of the parts stack-up. I believe that by removing most (or all) of the clecos across the top edge of the firewall and then riveting around the corner, fitting and pulling one rivet at a time while the pieces are free to move and pull together will allow the gap to close where the rivet is pulled.

I’m planning to install the ballistic parachute and that means I’ll be needing to accomplish some dimpling for most of the holes across the top of CF-RIB-003 and actual countersinking with a 120 deg pilot-cutter, along the top edge reinforcing pieces of the firewall, to accept 3,2 x 8 mm countersunk rivets. More on that in a future installment.

We’ll see how it all goes. Warmer days are ahead.

Engine, Propeller and Firewall Forward Kit – Ordered

I can see the end of the airframe assembly down the road and setting the wheels in motion to have the engine group arriving in 3 months or so, will keep me motivated to accomplish tasks in order to be ready when it all gets here.

The engine is the BRP Rotax 912iS Sport. It’s state-of-the-art. I’m absolutely set on having a 21st century engine for a 21st century airplane. It’s a mere 100 horsepower, but it’s the engine for the Sling 2 – IMO.

Yes, there is a 115 horsepower turbo engine option – which offers more performance to be sure, but it’s significantly more money, it’s got a turbocharger to maintain, not quite as high-tech – doesn’t have FADEC (computerized engine management system), plus – it demands a constant-speed propeller that costs 4 or 5 times as much as the fixed-pitch unit I’ve decided on for my machine.

Speaking of propellers – the propeller of choice for the 912iS powered Sling 2 happens to be the very sharp-looking, carbon fiber, 70 inch diameter, 3-bladed, ground-adjustable Whirlwind GA-RW3B, dressed with the perfect spinner.

Sling 2 Aircraft Fitted with Whirlwind Composite Propeller

The engine comes from BRP Rotax in Austria, through their South African distributor – Sling Aircraft and then to the USA. Eventually, it all has to make its way to the Upper Left Corner, where I am, in out-of-the-way Sequim, Washington. It’s a roundabout, slow-boat process – no doubt about it.

Because the engine and aircraft are of African decent – I’m expecting the engine fittings are going to be metric, as opposed to UNF – more typical for aircraft in the US. The engine itself is metric, but I understand that they can be had with UNF fittings for oil and fuel lines. However, the firewall forward kit is going to be for a metric engine and I’m not going to try to swim upstream. Go with the flow. Someday, if it really bugs me I could probably convert it from metric fittings. In the meantime, I’m going to put it all together and go flying – as it comes.

It’s pretty darned exciting and really something to look forward to.