Preparing the rudder parts during the last few days of December and on into the first week of January 2020, involved increasingly familiar processes.
Inside the shop, deburring of all edges and holes was done with my Avery Speed Deburr tool and Scotch-Brite C/P 7A wheel. Light scuffing with a fine (red) Scotch-Brite pad seems to help make subsequent chemical treatments more effective. Initial parts degreasing was done by wiping with a splash of acetone on a paper towel.
Outside the shop, degreasing continued with Extreme Simple Green Aircraft Cleaner, using a soft clean rag, followed by a water rinse from the garden hose. It’s winter on the Olympic Peninsula and my well water is very – VERY – cold. My hands, wearing only thin nitrile gloves, are almost frozen. A few minutes in the shop to dry the parts and then it’s back outside to apply Alumiprep 33 with a silicone basting brush and freezing hands, while hovering over a black plastic mortar tub. Rinse, dry and repeat – this time with Alodine 1201.
It’s cold and it takes until the afternoon to get the shop inside air temperature above 50 degrees F. It’s something of a hassle to run my paint booth vent fan, as there are some gaps that let cold air in. Without the venting, I quickly and lightly spray just a few parts per day – often only one side. Then I have to abandon the shop until the next morning. It took several days to prime all of the rudder parts.
For me, degreasing and chemical treatments take hours and hours – most of it outdoors. I’m trying to use absolutely minimal amounts of material, not make a mess, and get satisfactory results. I just can’t afford to make or deal with dipping tanks. I tried to save time by not etching with Alumiprep. Unfortunately, I’ve found that even with thorough degreasing, there were places where the Alodine instantly sheeted off un-etched aluminum surface. Those parts got re-scuffed, etched and then re-treated with Alodine. I’ve tried not scuffing and short-cutting other steps – only to find that results tend to reflect the level effort that I put in.
The parts quality of the TAF Sling 2 kit is frankly remarkable – excellent in IMO. I could probably get away with little to no deburring – certainly much less than I’ve been doing. Priming is truly in the realm of optional effort. I’m taking it slow and having fun doing it all.
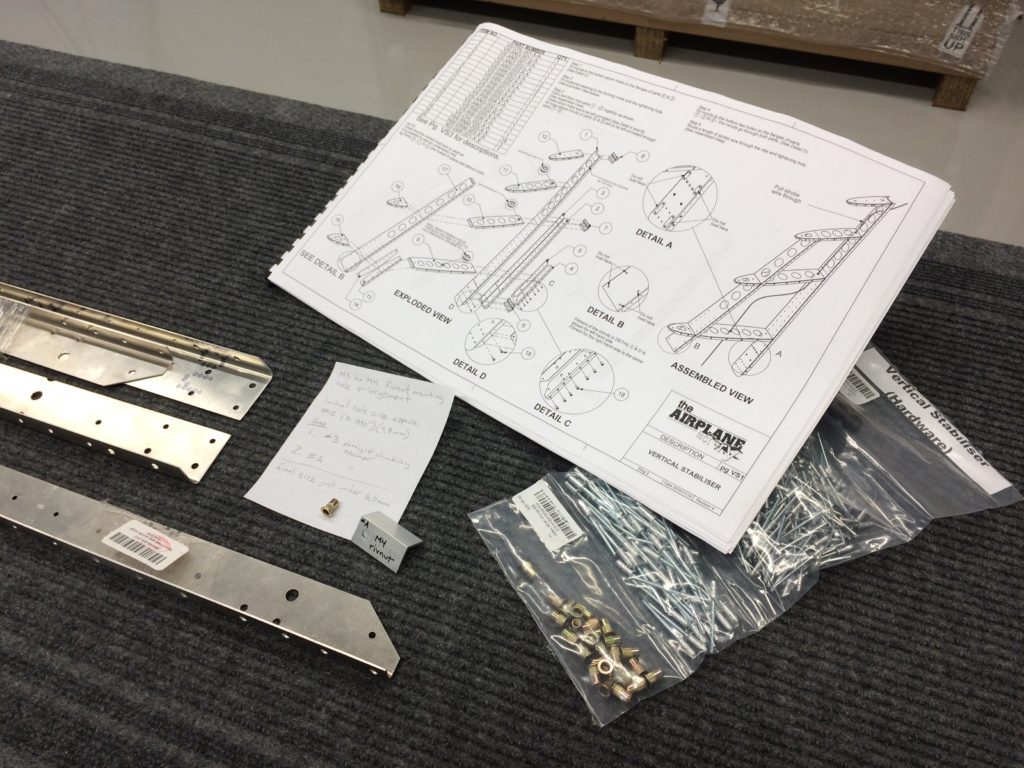
Somewhere on the TAF website there is a recommendation to start your building journey by ordering only the empennage kit and putting it together over a weekend – just to see what you’re in for. Maybe someone could take the parts out of the box – rivet them together over a couple of days – and end up with serviceable tail feathers. I suppose it’s mechanically possible, but highly unlikely, even for an experienced kit builder – if they haven’t previously built the empennage for some model of a Sling aircraft.
I believe a significant limiting factor of how fast you can go – is missing information detail. There are certainly a few pitfalls that only careful consideration will allow you to avoid. It takes time to understand. Achieving correct part orientation, relaxed fit and knowing exactly where and where not to rivet – is very important. If you get ahead of yourself, it’s going to take considerably more time, effort and cost for rework. Be careful. Strive to get things right on the first go.