Incorporating a VOR antenna keeps my options open. The antenna gets built permanently into the VS structure. I have to commit to the antenna choice now, but not the avionics. The Rami AV-520 happens to be an ideal size and has removable whiskers. If I eventually decide that I don’t want or truly need VOR/LOC/GS capability, the whiskers come off and the VS of the bird is clean.
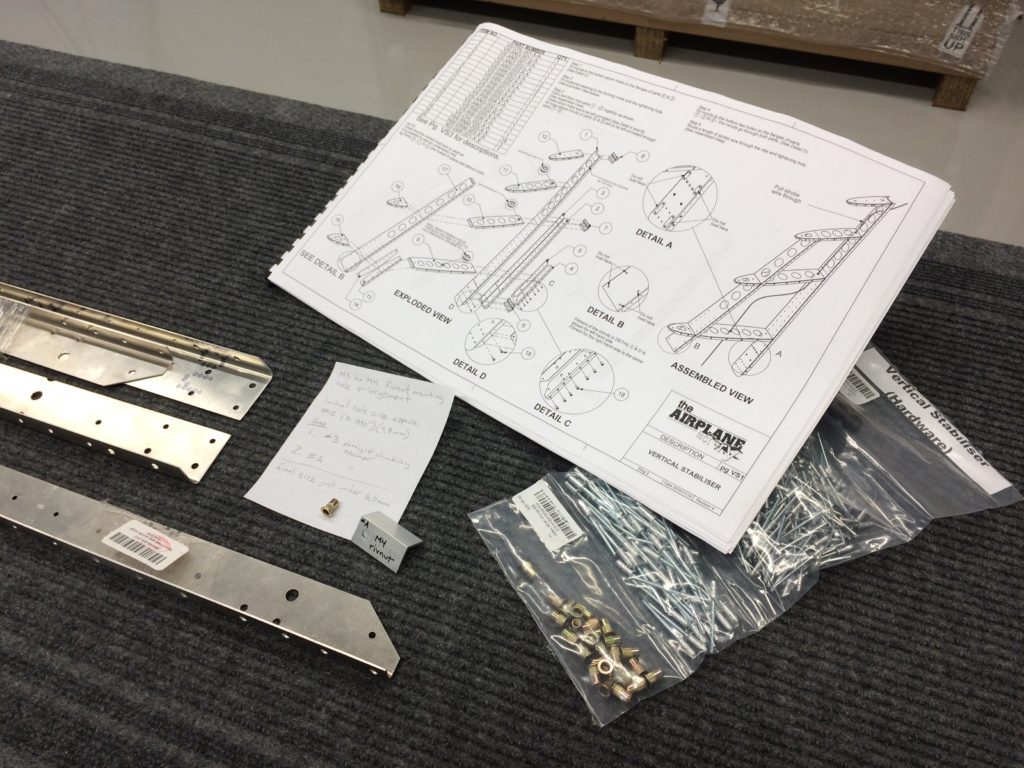
Optimum mounting the antenna requires a little custom fabrication. A doubler plate must be positioned and the mating rib drilled for rivets. I ordered the doubler base-plate part number from TAF. The top VS rib gets modification to accommodate the whiskers and provide access to set-screws.
The fabrication process I undertook was a variation of what is described in the Empennage Construction Manual, pp. VS4. Eventually, small holes also need to be located and created in the VS skin to accommodate the whiskers and tool access to the set-screws. Careful positioning of the antenna base allowed me to minimize impacts to the VS top rib and the skin.
Rivet clearance areas need to be machined into the (hard plastic-like) antenna base. Several rivets also need to be shortened. The general process for rivet shortening is in the construction manual. There are places where space is tight and a bit of finesse helps to achieve good fit.
I’ve finally gotten to the point of acomplishing the very first step on page VS1 in the Empennage Construction Manual! I’d been worrying about it. Getting the rivnuts securely mounted calls for a rather deliberate process with good technique. It all went very well. What a relief.
Having an effective tool – Astro Pneumatic Tool ADN14 Rivet Nut Drill Adapter Kit – and practice made the day. I’ve seen a couple of other builders recommend this particular tool. Because it relies on a cordless drill motor and identification of an appropriate torque (clutch) setting, I felt there would be a good chance of getting consistently good results. This seems to be the case.
Practice! I got an assortment of metric rivnuts and used the tool to work with them until I knew exactly what to expect. Now I have 14 perfectly mounted rivnuts!
BTW – the KAI mentions using high strength Loctite to insure that the mounted rivnuts don’t slip in their holes. I say – learn how to mount them firmly and they won’t slip. No Loctite is needed. Because IMO – if they’re not tight enough to stay put, then they’re not satisfactorily mounted.
Over the course of 3 days, I got my feet wet with metal preparation and applying self etching primer. Deburring seems pretty straight forward. I got great results on small holes using the Avery Tools Speed Deburr and Countersink tool. I started out using a file to smooth edges, but I as I transitioned to my Scotch-Brite cut and polish wheel (C/P 7A-Med), I gained confidence and proficiency.
Next, I did an initial degrease step outdoors with acetone and paper towel. This also seems to get much of the material identification printing off of the surface. Then, I did a second cleaning with Simple Green Extreme Aircraft in 3:1 solution with distilled water, rise with water and dry. From this point, nitrile or white cotton gloves handling is in play.
My etching and conversion coating results are probably adequate, but not anywhere near as lustrous as others have masterfully achieved – notably those by Des Howson for his Sling 2 Taildragger build.
Working with Bonderite C-IC 33 Aero (Alumiprep) and M-CR Aero 1201 (Alodine) proved a little more challenging for me than deburring. I have to work outdoors with a mortar tub, garden hose and cold well water. It’s chilly too. I’m economy minded, so I’ve opted to use a [silicone basting] brush application technique with solution concentrations called out by the technical process bulletins published by Henkel.
The tiny batch of PTI epoxy primer I got from Aircraft Spruce was completely unusable, with clumps thicker than clay and no luck trying to thin/reduce. I had intended to use it to prime the rear channel parts of the vertical stabilizer. To avoid further delay, I just went with self-etching primer.
My build has officially begun. Even before I can complete the very first step of constructing the empennage, I had to enlarge mounting holes to accommodate M4 rivnut – blind fasteners. The process went well and I’m very glad to be underway.
I’m waiting for a #19 straight chucking reamer to arrive on Tuesday. Then I can enlarge screw clearance holes corresponding to the rivnuts.
I ordered my quick-build kit in July and I’ve had my empennage sub-kit since August, but have yet to pull my first rivet. I’m finding that it’s taking many hours for research and for me to learn enough background information to make confident choices that will set the direction and metrics I will endeavor to satisfy as I build. I think that’s part of the fun.
Surface priming – materials and techniques – is a significant matter. I’m still wrangling a bit with that, but have determined that I have to be practical, or I’m never going to put pen to paper, so to speak. My priming standards are going to fall somewhere closer to the minimum of bare aluminum rather than the extraordinarily high level demonstrated by the truly awesome work of Pascal Latten for his Sling 2 build. Spray painting can be a messy and tedious business. I’m not a professional and I want to keep things clean and simple as possible, while achieving a worthwhile result. In a nutshell, I’m going to use RustOleum self-etching aerosol primer for most internal mating surfaces. For more exposed areas, such as the hinge areas and outward facing structure of the horizontal and vertical stabilizer assembies, I’ll use Alumiprep 33 and Alodine 1201, coated with more durable PTI 2 part epoxy primer – and ultimately the final color top coat.
Wiring, VOR antenna and external lighting choices figure in early for the empennage build.
Aveo Engineering produces what I think is the best option for the anti-collision light atop the rudder. For reasons that included fit, features and color, I’ve opted for the aviation red Posistrobe MiniMax to complement Aveo 3-in-1 nav/position/strobe lights on the wingtips – exact model number of the wingtip lights TBD. Without a huge amount of work, and or ready access to a completed Sling 2, it’s really mostly an educated guess that the overall lighting results will satisfy FAR 23.1385 – 23.1401. Hopefully it will and the DAR will agree.
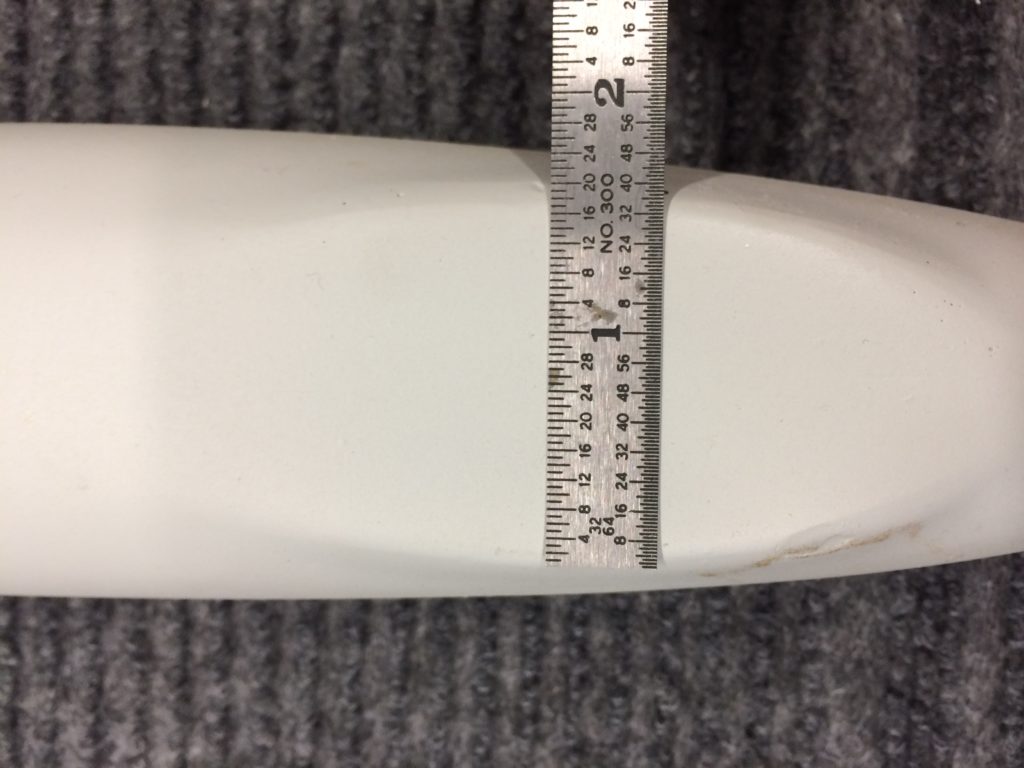
Rudder Cap Strobe Mounting Area – small, even for the 1.74in wide MiniMax Light
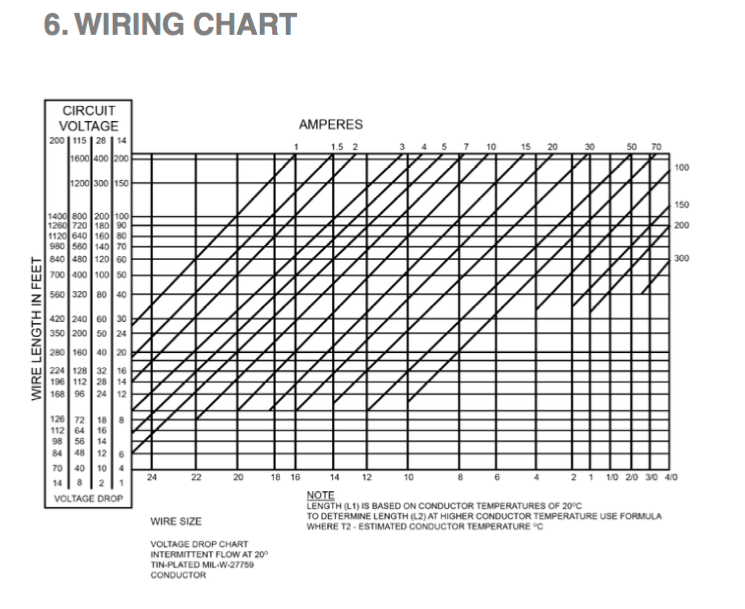
Working through the electrical current requirements of the LED rudder strobe against AC 43.13B, I’ve tried to determine the necessary gauge and then acquire M27500 shielded cable to replace the TAF-supplied PVC jacketed wire in the kit. Based on actual experience with such wire in my Warrior, I’m not impressed with its suitability for aircraft applications. Based on my calculations, I think readily available 22 gauge conductors would be sufficient to handle peak current less than 3A over a run of 20ft. But, based on some data from the awesome builder I mentioned earlier, it’s possible that 20 gauge wire would be a better choice. I ordered some M27500-20TG4T14 from WireMasters. The minimum order was 100ft. This wire may turn out to be overkill for the small LED light. We’ll see.
You’ll find a chart like this in AC 43.13B
The VOR/GS antenna gets built into the vertical stabilizer, so I have to make a commitment to that, even before I’ve settled on my avionics choices. I’m hopeful that conformance with FAA TSO: C34e, C36e, C40c will make my choice compatible with whatever I finally choose for a VOR/GS receiver. Keeping the antenna price down will also make it easier to go with only a GPS navigator. At least the antenna and wiring will be in place. I’ve opted for the Rami AV-520 which has 2.5in diameter base “puck” with removable whips, built-in balun and coax connection.
I’m aiming for an advanced IFR all-Garmin EFIS panel with autopilot. We’ll see where it ends up.
I’ve ordered a bunch of stuff and it will be here next week. I’m perilously close to the official start my Sling 2 build.
Before I can accomplish Step 1 in my build, I’ll need to enlarge some holes to accommodate larger M4 fasteners. At some point, TAF changed from M3 to M4 size rivnuts for the vertical stabilizer and other empennage sub-assemblies.
The m4 rivnuts have been supplied with the empennage sub-kit, but the formed parts haven’t been revised to accept them. The build instructions have yet to be updated. Correspondence with TAF confirmed that I will need to do hole enlargement. As the builder, it’s up to me to determine how. This involves tracking down proper tools and developing confidence in a process.
The TAF KAI calls for rivnut mounting holes to be as tight as is practicable and I’ve concluded that a size #A straight flute chucking reamer is the right size to achieve that. This results in the final diameter just under a nominal 6,0mm mounting hole size commonly specified for M4 rivnuts.
I found reaming from #12 to #A size was best done in 2 steps. First, #3 and then #A. This allows the beveled tip of the reamer to align and track nicely with the existing hole as I hold the part by hand and feed the reamer using my drill press at about 750 rpm.
There are also holes for the corresponding screws that will have to be enlarged, once I’ve identified each of them and established what fit clearance is best.
I’ve acquired reamers, developed the process and adequately demonstrated the skills to myself. I haven’t actually started on the build yet, but it feels good to see some aluminum chips in the shop. I’m very close to Build Day 1.
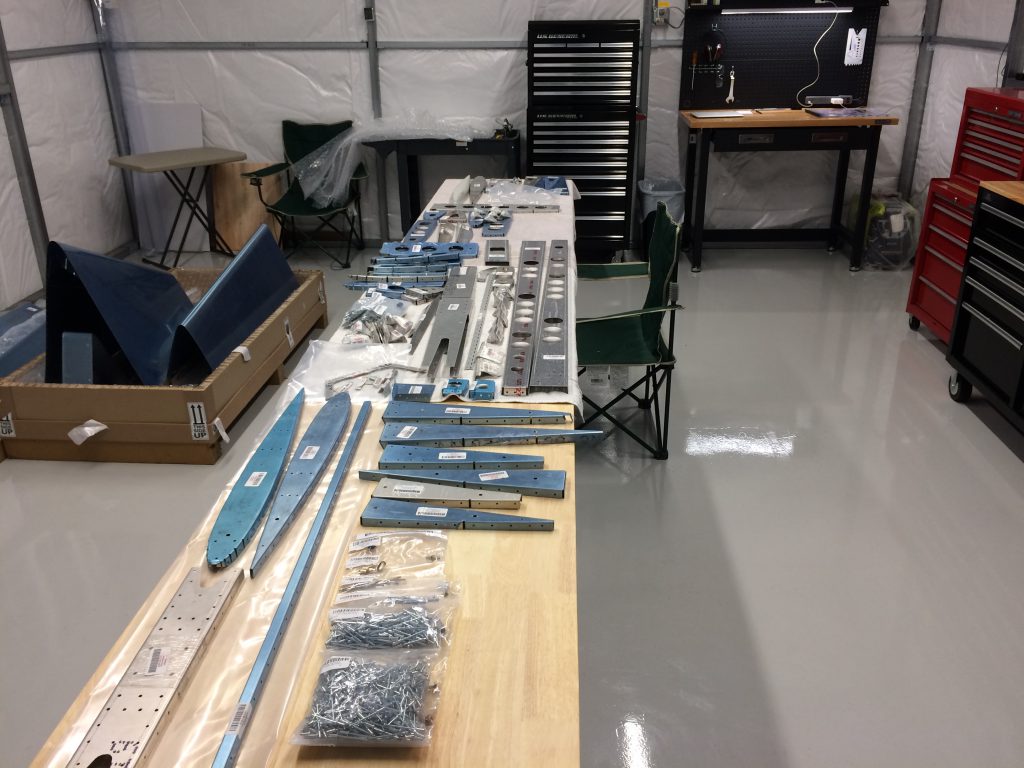
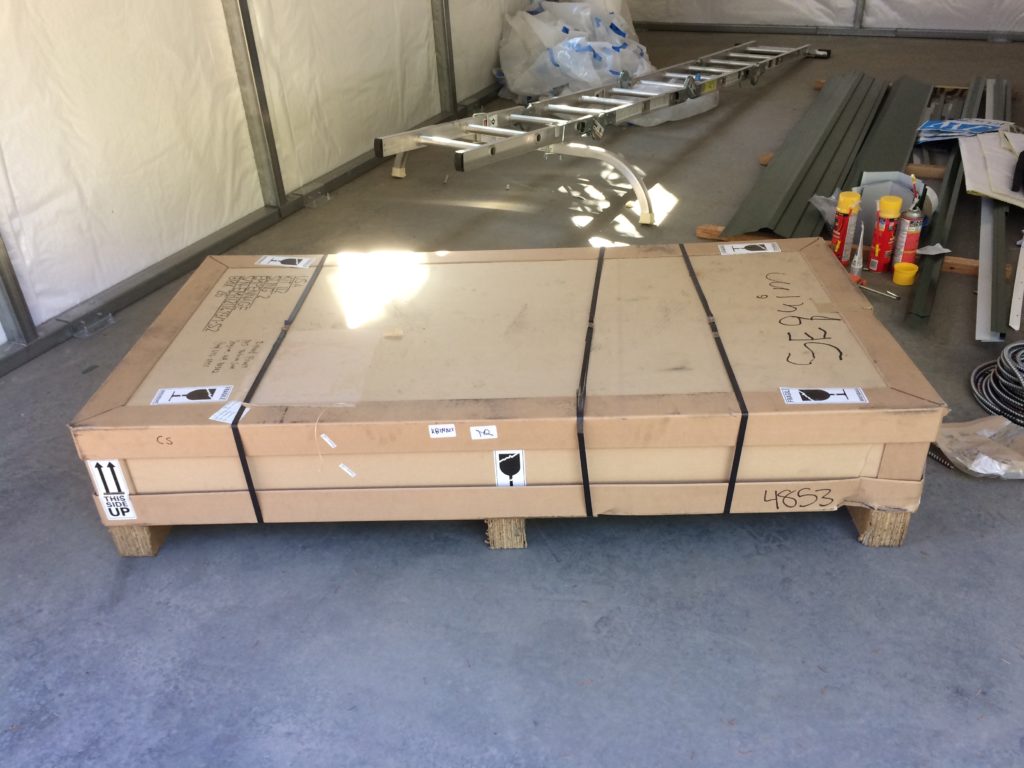
I checked that correct quantity of every part number listed on the kit packing packing list was present and undamaged. I went so far as to measure the thickness of all RIB parts and compared to the value listed on the packing list. Overall the sub-kit is excellent, however, I noticed a couple of small but unexpected deviations and contacted TAF to discuss them.
While waiting for my quickbuild kit to arrive, sometime in March 2020, I’d arranged with Barry Jay (TAF) to take delivery of a sub-kit to get my end of the build going. The kit is here before my workshop is complete!